02-Reading RIB
Previously we ended with an example complete renderable RIB scene that prman understood and would produce our first image. Now let’s take a closer look at the contents of that scene.
The First Three Lines
##RenderMan RIB
##Scene beginning.rib
version 3.04
lines 1-3
The first three lines of this particular RIB scene setup how the rendering program deals with the rest of the scene content. Lines starting with a hash character denote comments, these are normally ignored and are for human annotation only. However the first two lines here, whilst starting as a comment are actually formatted information, and are denoted by two hashes and the content starting immediately after the second hash. This information is mainly used by programs reading the RIB scene before the rendering program; and is used for asset management. The third line tells the RIB parser the expected version. Everything after these three lines is RIB proper.
The RIB Proper
Display "beginning.exr" "openexr" "rgba"
Format 640 480 1
Projection "perspective" "float fov" [60]
Hider "raytrace" "int maxsamples" [512] "int minsamples" [16] "int incremental" [100]
Integrator "PxrPathTracer" "example"
lines 4-8
These lines are what you might best describe as a preamble; they create global state that affects the entire render, normally this state does not change for an entire scene. Although in this example we are only dealing with a single image. To save from the headache of matching line numbers to the RIB scene, I’ll switch to using the RIB command name at the start of each line.
Display is stating to the renderer to put the output of the render (the raster image) as an OpenEXR file called beginning.exr. Notice that we are only outputing colour channels r,g,b and a for the present.
Format
describes the output image size and the aspect ratio to use, [640x480]
is a fairly standard test size to use.
Projection sets up our camera model, we have a couple of useful options for the type of model to use, such as orthographic or currently perspective. I have included a render using the orthographic model (see below). Before we continue onto the next line, we will take some time here to describe the parameter and data formats used in the RIB scene.
float
denotes an optional parameter for the Projection
command whilst [60]
is the data for said parameter. The parameter is an inline specifiction of what the data will be. In this case fov
parameter is a floating point number. The original versions of the interface required that you declared your specifiction of the parameters you wished to use before you used them in a seperate command. Thankfully we can use the inline method instead. Although this will make an interesting subject later in the series.
With that in mind, our next command is Hider and it has a good number of parameters. The Hider command sets how the renderer should deal with hidden surfaces. In this case we are using the raytracer. This is followed by three parameters: maxsamples, minsamples and incremental.
Quick Peek in the Plugins Directory
Integrator
is our first command using a plugin; in this case PxrPathTracer
denotes a plugin which the renderer will load and use. You can look at all the parameters this plugin can take by peeking at the file in the ${RMANTREE}/lib/plugins/Args
directory.
cat $RMANTREE/lib/plugins/Args/PxrPathTracer.args
   ...
   <args format="1.0">
    <shaderType>
        <tag value="integrator"/>
    </shaderType>
    <param name="maxPathLength" type="int" default="10"
         min='1' max='20'
         connectable="False">
        <help>
    Controls the absolute upper bound on the maximum ray depth. A
    value of 1 for this parameter will allow direct illumination only,
    while a value of 4 will permit up to 3 bounces of global
    illumination. Default value is 10.
        </help>
    </param>
    ...
Notice the data format is in XML. We get a lot of information per parameter, such as type, min and max and also the default value and some help blurb explaining it’s use. Args files are very handy in this way. Later in the series we will write a utility tool for searching arg files.
Graphics Stack
Let’s continue with our look at the RIB scene.
WorldBegin
	...
	AttributeBegin
		...
	AttributeEnd
	AttributeBegin
		...
	AttributeEnd
	AttributeBegin
		...
	AttributeEnd
	...
WorldEnd
lines 9-29
This part of the scene describes what we want the renderer to render; it describes the world. I’ve removed the important content to focus on the structure. Here we are introduced to the World and Attribute blocks. Each block has a Begin and End statement and can be said to contain all the commands within it. We call this a graphics stack. Generally the renderer will actually begin rendering once it reads the WorldEnd command, so inorder for anything to be produced your RIB scenes need to have a WorldBegin / WorldEnd pair.
An Empty World
Lets see what happens if we render an empty world.
render -d it -progress empty_world.rib
Z10003 {WARNING} Shaders invoke raytracing, but no traceable objects exist.
Z10003 {WARNING} Shaders invoke raytracing, but no traceable objects exist.
Prman complains about no traceable objects but will still produce an empty image. Notice that without objects to trace the alpha channel remains empty (read transparent).
Positioning
WorldBegin
	Translate 0 0 10
	AttributeBegin
		Translate 0 10 -5
		Scale 3 3 3
		Light "PxrSphereLight" "fill_light" "float intensity" [5.0]
	AttributeEnd
lines 9-15
Translate moves the current position of the world (which is zero, as we haven’t moved yet) by the x,y and z values. This command is effectively pushing the world (along the z axis) by 10 units. Imagine the world 10cm (units are undefined, using centimetres for reference) in front of you now.
AttributeBegin effectively says remember the world how it is; once this block ends we return the world to how it was. This is useful to allow a hierarchy of objects within the world.
The second Translate here moves the fill_light 10 units up and -5units forwards in space. If you were looking at it, it would be positioned 5cms in front of you and 10cms above you.
Scale tells the renderer how big this current thing should be. In this case it is 3 times the normal 1 unit in all dimensions. Because the dimensions are seperated we can easily squash and squeeze an object with this one command.
Our First Asset
Light — this is our first object (or asset,prop etc…), here we are telling the renderer that there is a light called fill_light , of the type [plugin] PxrSphereLight. We have overridden the default intensity of the light with 5. Lets see what it normally would be by checking the args file.
grep "\"intensity\"" -A 10 $RMANTREE/lib/plugins/Args/PxrSphereLight.args
<param name="intensity"
		label="Intensity"
               type="float"
               default="1.0"
               connectable="False"
               widget="default">
            <help>
                intensity:  Specify the intensity
		of the light source linearly. The light intensity
                is computed using physical units.
            </help>
        </param>
As you can see the normal default value is 1.0 for this light’s intensity.
AttributeEnd this resets our position back to how it was before AttributeBegin.
The Key Light
	AttributeBegin
		Translate 0 0 -10
		Rotate 180 0 1 0
		Scale 2 2 2
		Light "PxrSphereLight" "key_light"
	AttributeEnd
lines 16-22
This is the second light asset, with the handle key_light. The only new command in this block is Rotate, we are rotating the asset 180° around the y axis. The position of the light ends up where the viewer is.
Our Hero in Red
	AttributeBegin
		Bxdf "PxrDiffuse" "surface" "color diffuseColor" [1 0 0]
		Scale 2 4 2
		Sphere 1 -1 1 360
	AttributeEnd
WorldEnd
lines 23-27
Now we define the only object in the scene. A sphere.
Bxdf
this describes a function for scattering light across a surface, this is otherwise known as a shader, with it we can create all manor of surfaces. Notice that the diffuseColor
param is of a color type, normally repesented with a 3 value vector. In this case we have set the red channel to [1.0]
thus our hero’s surface is coloured primary red.
Scale has been mentioned above but note that we stretch our hero in the y axis.
Sphere one of the built-in quadratics objects, we will take a deeper look in the next article; so for now, the data describes a perfect spherical surface [for this command].
WorldEnd finally we get to the end of this short RIB scene. As mentioned earlier, this command sets the renderer to work, because we have told it that no new content is to be described.
Writing RIB in Golang
Our first golang program will be simple. It will just output a copy of the RIB scene we have been describing thus far.
RIB generation program
/* renderman/fromscratch/beginning.go
 * mae 012018
 */
package main

import (
	"flag"
	"fmt"
	"os"
)

const Version string = "renderman/fromscratch/beginning program 1"

func main() {
	scale := flag.Float64("scale", 1.0, "`scale of output image")
	filename := flag.String("filename", "beginning.exr", "output filename")
	intensity := flag.Float64("intensity", 5.0, "fill_light intensity")
	maxsamples := flag.Int("maxsamples", 512, "maxsamples for raytrace hider")
	minsamples := flag.Int("minsamples", 16, "minsamples for raytrace hider")
	red := flag.Float64("red", 1.0, "red colour channel")
	green := flag.Float64("green", 0.0, "green colour channel")
	blue := flag.Float64("blue", 0.0, "blue colour channel")

	help := flag.Bool("help",false,"print the help")

	flag.Parse()

	if *help { …
This is a pretty straightforward program; I’ve added some code for altering the parameters in a nice way.
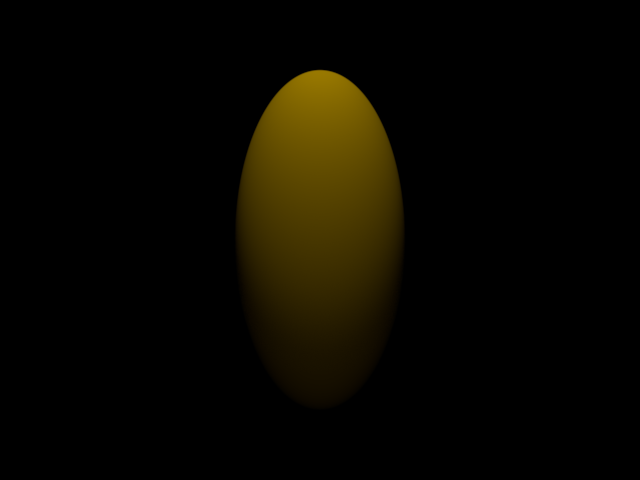
go run beginning.go -green 0.596 -intensity 8.0 -filename "orange.exr" > orange.rib
render -d it -progress orange.rib
Before we end; some Ideas for the Reader
Change up the assets in the RIB scene; add another sphere, a light or change their positions. Using the parameter descriptions in the ${RMANTREE}/lib/plugins/Args/PxrDiffuse.args
play around with surface properties of the sphere.
Next Time
We will get into the rest of the quadratic primitives and create a golang program for displaying those primitives in interesting ways.